1st post of 2022, and since the previous period found me on a pc, retouching for the season of 2021 albums, I figured I’d talk a little about the process of skin retouching in photos.
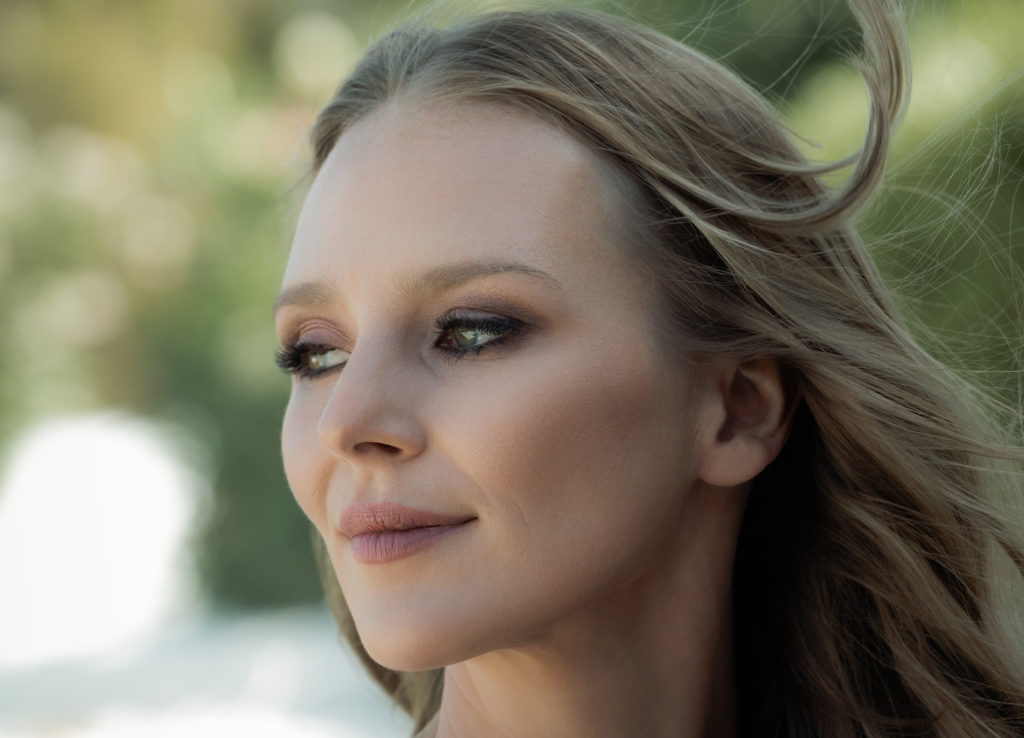
Above you’ll see an example of the work I do (You can view the whole gallery of the particular wedding here). It’s a zoomed in photo, I recently retouched. The process of skin retouching is pretty straight forward for me and it considers of all the photos that will be included inside of an album. An album is the story of the day of a wedding, printed. And as the well known artist and educator Katrin Eismann says, “The truth is revealed when the ink hits the paper”, therefor everything must be perfect, once the album is sent out for printing.
1st of all, I need to clarify this. Just because people see a lot pictures on Instagram, looking way too much unnatural, kind of muddy skin. This has nothing to do with that false unrealistic look. There are certain steps in high-end retouching, which when you follow, then the result is realistic, and at the same time elegant and beautifully presented.
The number one priority is to retain the skin texture. All those micro pores that are different to each person’s face. In order to achieve that, I start by eliminating any kind of blemishes. I use 2 different layers. One for the skin texture, and one for the color, shadows and highlights of the skin. This method is called frequency separation. In the texture layer, I work with any kind of blemish, and in the color layer, I eliminate red marks, or any unnatural colors of the skin. I even out the make-up whenever I need to, as well. The goal is to have a smooth skin, with natural consistent colors that retains all its texture. I often use dodge and burn, when applicable. You can search the terms “frequency separation” and “dodge and burn” in Google.
It’s not only about marks and blemishes.
It is about its shape as well. After I finish with all the skin marks, I go to liquify in photoshop. There, I want to achieve a smooth shape for the face. Lenses sometimes distort, to a point. With small steps, I alter the face in a non destructive way. The goal here is to achieve elegant lines and shapes. I eliminate any hard edges or any kind of distraction.
Last, but not least is the contrast and color of the face.For contrast I use selective dodge and burn again, or sometimes a curves layer to achieve this. I want to darken the skin, always by having in mind from where the light fall on it. I also want to make the eyes pop, in order to attract the viewer’s eye on them. For colorizing the skin, I use a couple of methods. A selective color layer is my number one, and sometimes I use gradient maps as well. The skin, naturally has one color and a couple of different shades of it. The camera though, depending on the light that falls on a face, sees various other shades of color. Everything must be perfect, when dealing with a portrait.
So, if you still think that skin retouching a portrait photo, is just a simple click of an Instagram like button, you may have to reconsider. Preparing an album of a wedding is a time consuming effort, but the final result really makes it worth every minute on a PC. Also rest assured that the final delivered product (album) will have the maximum quality control, as far as my knowledge extends. And every day that passes, trust me, this knowledge and skills extend even more.
If you enjoyed reading the article and you have something to say, you can always e-mail me regarding any thoughts. I would be more than happy to hear out from you and answer any questions you might have.
Enjoy 2022!!!

